
Getting those pretty pictures in your sidebar, or anywhere on your website for that matter, can be a difficult task if you’re not gifted with the knowledge of HTML. Now I have no idea how to code HTML, none at all. But I’ve been using a little trick which surprisingly not many people have been using. So I’ll be unveiling my black magic method of getting those banners and images you want in your sidebars without having to code anything.
If you can copy and paste… You’re going to be able to do this!
So let’s enter my lesson of witchcraft and wizardry and begin…
Getting Your Image Into A Blank Post
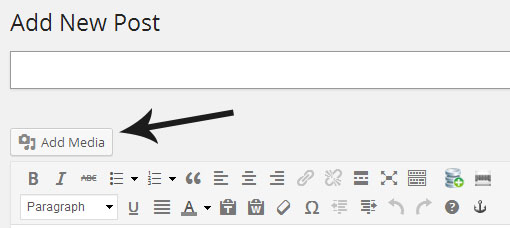
First off, I want you open up a blank post within your WordPress dashboard. Then add the image you want for your sidebar to that post just like you’d add any other image by clicking on that “Add Media” button.
Pretty difficult so far right?
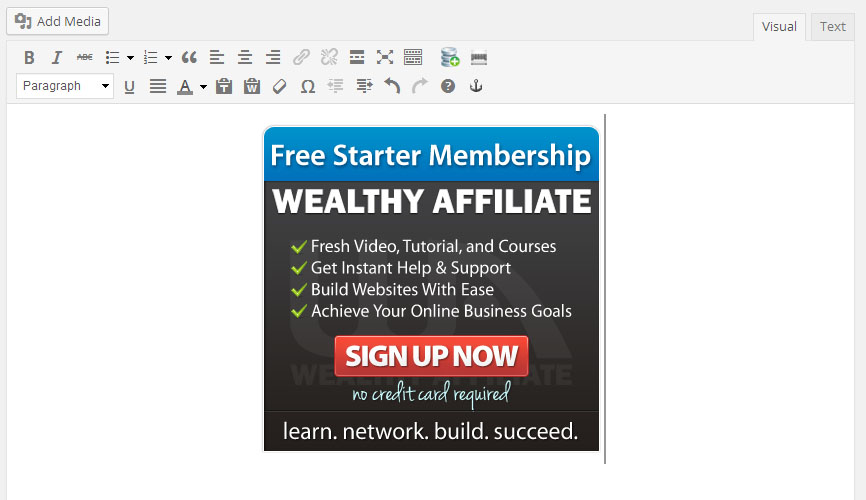
Now we have that image in the post decide whether you want it aligned to the center, left or right. If your image is smaller than the width of your sidebar it will be noticed. So I’d recommend you align it anyway even if it is the same width as your sidebar. We might as well.
Hyperlinking The Image
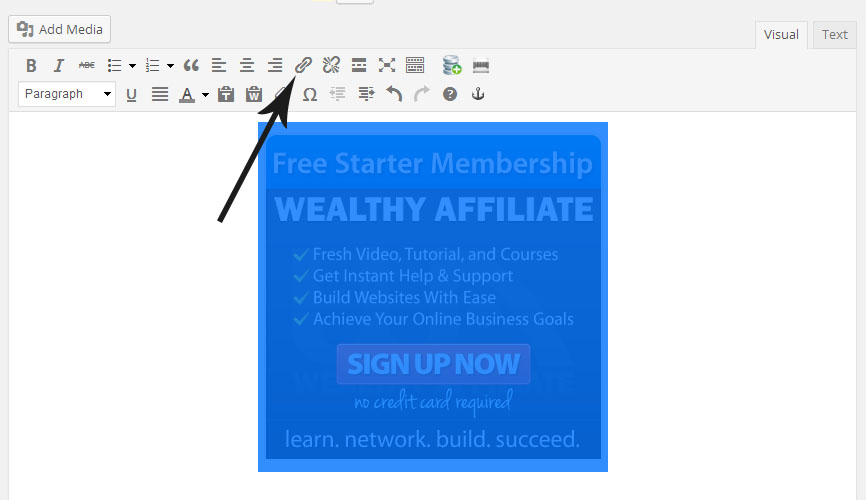
Do we all know how we normally hyperlink some text? We highlight the text and click the little links in the kitchen sink at the top of the editor in the dashboard.
Well guess what? Do the same with the image!
Click on the image so it’s highlighted blue and then click the little links button.
Now you enter the link you’ll want people to go to when they click the image in your sidebar. Also, make sure you click the “Open in New Window” if you want people to stay on your website too. I always do this if it’s a link that isn’t on my website. If it’s a link to another page on my site I leave it unchecked.
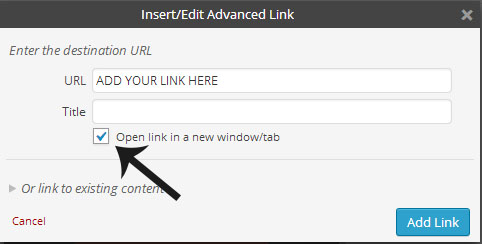
I find it so annoying when a website has their links all set to open in a new window when it’s linking to another page on the site. Why would I need 7 different tabs for the same website open!? You don’t, so think about the visitor and the user experience.
Getting The HTML Code
So we’ve got our image, it’s hyperlinked with the link we want and it’s all ready to be added to the side bar. So we should be in our visual editor at the moment.
We need to head to our Text editor. Once you’ve clicked on the text tab you’ll see loads of writing. This is our HTML code! That’s the black magic!
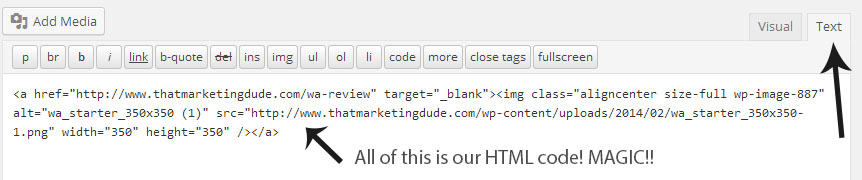
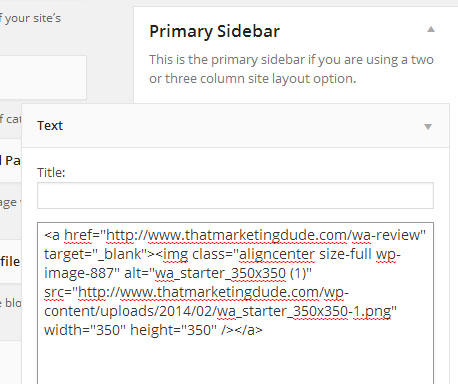
Now all we need to do is copy that text and then paste it into a text widget and hit save. Place that text widget in your sidebar area within the widgets section wherever you want it to appear in your sidebar.
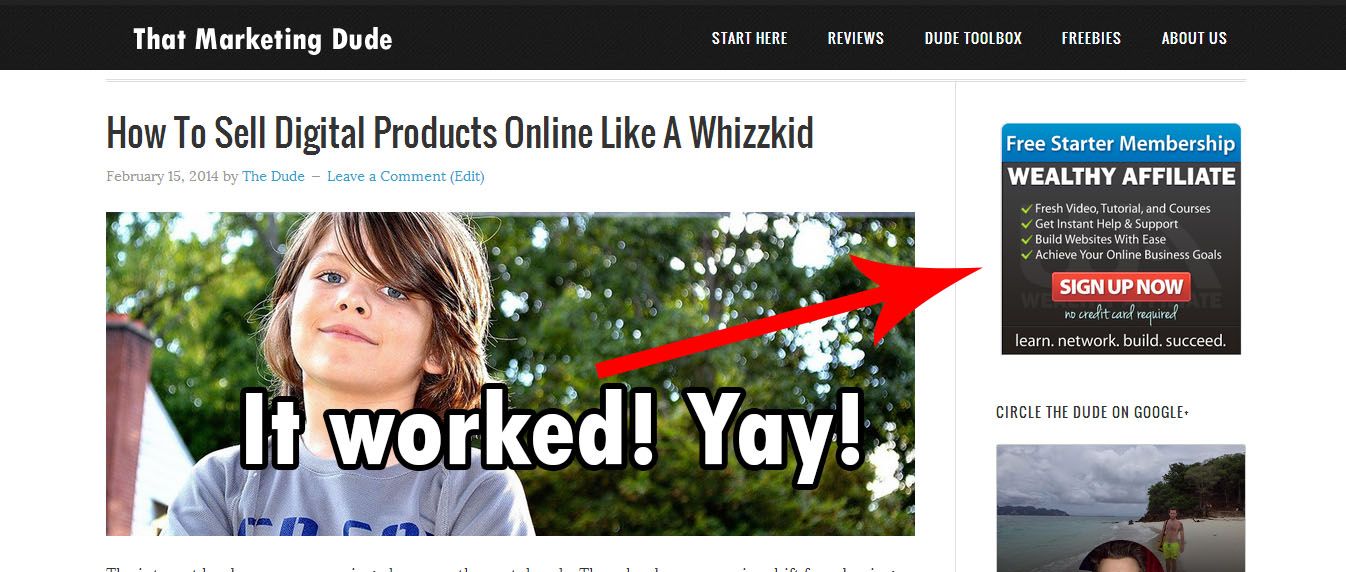
Now check your site and test it to make sure it works.
All The Hocus Pocus Is Over…
That’s all dudes and dudettes!
You can use this for anything, not just adding banners and images in your sidebar. If you want to hyperlink an image within a post and not for a sidebar, then follow all the same steps up to “Getting The HTML Code” and you’ll have a clickable image within your post.
If all of this still seems confusing, then there is the Image Widget plugin that you can use. But too many plugins do slow down your site, but it’s quicker and simpler.
I hope you guys find this helpful and can now get some awesome images for your sidebar now!
If you’re after more little tricks and techniques like this then keep an eye out as we release more and more. You can also check my #1 recommendation as this place also shows you how to do some funky things for your website in their classrooms section. They have lots of members that add all their tips and tricks and it’s all free.
If you have any questions or comments, leave them below and I’ll help you dudes and dudettes out!
Bring your game faces dudes and dudettes


